Tuesday, December 31, 2013

Top 10 in 2013

 My top 10 of 2013 plus a card and project. 
It's fun to look back at everything I've created in the past year and definitely hard to pick a top ten. Some made it easily and others were a bit more difficult to narrow down. I love them all for different reasons. That's why we scrap right?
Anyway, here they are:


I made quite a few cards this year. Something I haven't done much of in the past.


I've also made a lot of projects for my daughter's sports teams and I'm really starting to enjoy it.
 

Thanks so much for going back over a wonderful year with me. I can't wait to see what 2014 brings! Bring it on!! :)Ange

Monday, December 30, 2013

Believe

Today I'm using sketch #298 from Nuts About Sketches and the Dec kit from Scrapbook Circle, All is Bright. I really like the way this page turned out.


Thanks for stopping by today!
:)Ange

Christmas Magic

Hi! 
I have a layout I want to post real quick. I used a sketch from 3 Scrappy Boys.


I will have a bigger post with detail photos later in the week.
:)Ange

Sunday, December 29, 2013

A chilly layout

 Hello! I hope you all had a wonderful holiday and spent a bit of down time with good friends and family. Around here, we're attempting to stay warm. I'm not a big fan of the cold temperatures, but I am a huge fan of the Winterland line! The blues, purples and icy whites are fantastic for your winter photos. Check it out:


I took this photo from my front porch last year (I try not to venture very far from the warmth of my house when possible lol). I loved the way it turned out and I knew this Winterland line would be perfect to keep the cold chilly feel of the photo. These papers are so pretty that they could stand alone. But I did add just a bit.


I used a white mist on the dark purple of Let it Snow for a shimmery mat under my photo, layered some Below Zero under that and then added this fun die-cut. I punched snowflakes out of scraps and added them here and there with a bit of stickles.


In the upper corner I used this fun die-cut and a pretty snowflake sticker. I also inked all of my edges with a dark purple. I love blues and purples for this chilly effect.

  Thanks so much for stopping by today. I hope you stay warm this winter!
:)Ange


Supplies:
Moxxie - pps, die-cuts, stickers
martha stewart - punch
ranger - stickles
sei - ink
uniball - white pen
tombow - tape runner
ek success - foam adhesive

Saturday, December 21, 2013

Gifts & Tags w/ DCWV

 Hi! Have you seen DCWV's Holiday Glitzy Glitter stack? It is GORGEOUS!! I love it.
I've been using it for backgrounds on layouts and cards and now I'm using it as gift wrapping.
Perfect, right? I made 6 boxes, put some little toys in them and gave them to the kids I watch. They loved them (or maybe it was just the candy inside?).


My favorite thing about these papers, besides how beautiful they are, is that you don't end up with glitter all over you. It's really just amazing! It all stays put on the paper and it's easy to work with. 
I also added some cute tags using the Jolly Whimsy stack. 


I thought these boxes were really easy to make. My 12yr daughter found them here:
Boxes and made a couple. I pulled her boxes apart to figure it out on my own. 

Keep in mind a 12x12 sheet of paper gets you a box that is 3x3x3, perfect for the small gifts and so fun with this awesome glittery stack (that doesn't flake off when you're working with it!). And absolutely fun and quick for those small last minute gifts.
  Thanks for stopping by!

Happy Holidays,
Ange

Thursday, December 19, 2013

Special Delivery w/ DCWV

Have you seen Jolly Whimsy by DCWV? It is SO cute! I think I am in love with this stack. So today I have a layout for you using papers from this adorable stack.

I am a big wrapping paper person and I'll tell you why. Kids LOVE to tear paper! It's just fun and I love to see the look of excitement and surprise on their face when they reveal the wonder beneath the pretty paper. Maybe wrapping paper speaks to my scrappy side too? lol


The look of excitement on my son's face is what really grabbed my attention with these photos. I wanted to really bring that excitement to my page and I thought what better way than through torn wrapping paper?


So I picked this cute Letter to Santa pp for my background and then some fun prints that I could tear up and layer on my page. Then I cut the snowflake circles, Santa, and ornament from another pattern and added them to the page, a few with foam adhesive for dimension. 


In the upper right corner I layered some washi before adding my ornament for a little extra fun. Super simple and easy page that really brings out the joy of gifting. 
Happy Holidays! :)Ange

DCWV - pp, brad
doodlebug - washi tape
uniball - red pen
kaiser craft - ink
tombow - tape runner
ek success - foam adhesive

Tuesday, December 17, 2013

3 cards w/ DCWV

 Hello!
 I have some more fun Holiday cards for you today. I used DCWV Holiday Glitzy Glitter and Jolly Whimsy stacks for these cute cards:


The temperature was about 10 degrees outside when I took these photos and it made the glitter paper curl up. I was a little worried things were going to pop off or they weren't going to straighten back out, but almost the second I got them back in the house they flattened back up. 


 For this card I used this gorgeous red and silver striped background and then cut out the sentiment from the Jolly Whimsy stack. I hand drew and cut a pattern for the stockings so I could cut them out of the fun prints in the stack & hung them from twine. And the 24 I cut from a paper in the stack also.


I really like the look of the rolled pp, so I made a tree from some of the adorable patterns in the line and then added the noel wreath from the icons paper. The trunk is made from the barcode edge of the glittered pp, love it when those are useful! And a glittery star button from my stash.


This glitter pattern was so pretty I actually wanted to just use it as the whole card. lol But I added the cute little snowman from the icons pp, backed with the fun gold snowflake pp & then added the snowflakes and a bit of liquid pearls for fun.

I'm off to mail these. Thanks for stopping by today!
:)Ange

Monday, December 16, 2013

Moxxie with a NAS sketch

 Combining two of my favorite things for you today.
I love Moxxie's products. The papers are good quality, thick enough to stand alone and still easy to work with. Their rub-ons are hands down the best I've ever used and their stickers and die-cuts are super cute, fun and versatile.
Pair this awesome quality with one of Shawn's fantastic sketches and you just can't go wrong. So here is my layout for today:


These photos are from last Christmas. My older son was engrossed in a new book he'd gotten and my younger son wanted to play with him. So here he is putting his new remote controlled truck on Brayden's back and driving it over him. Brayden didn't seem to even notice. So cute, I love catching moments like these in photos.


Here's a closeup of the different strips of pp I used from Party at the Pole and the adorable candy die-cut! I inked all my papers in a dark green and added some fun liquid pearls for a bit of sparkle.


Here I used Moxxie's rub-ons for my title. I can't even tell you how easy these are to use. I lay them out to see where I want to stick them down and have no worries of them coming off the backing in the wrong spot and then when I'm ready I just rub them with my fingernail or a popsicle stick and they come right off. I've never had one tear because it stayed on the backing.
  I used a bow border punch on the red pattern just for a bit more fun. Super easy, fast and fun. Perfect for the holidays!

You can find the sketch and more awesome examples (there are some really unique ideas this week!) on the NAS blog here.

Thanks so much for coming by today!
:)Ange

Supplies:
Moxxie - pps, stickers, die-cuts, rub-ons
NAS - sketch #296
mls - alpha stickers
sei - ink
zig - red pen
stampin up - green pen
ranger - liquid pearls
paper studio - kraft cs
ek success - punch
tombow - tape runner

Sunday, December 15, 2013

Merry Christmas w/ Moxxie

I've made quite a few cards this season and I have to say, I think this is my favorite one! 


 Ever since I first saw these little guys in the Moxxie Party at the Pole line I've wanted to use them in a fun way. So as I was working on cards this week I decided a fun peek a boo card would be perfect. I wanted it to look cute and fun from the outside and the inside. I used the Snowfriends paper on the front, inked with a little bit of white for that chilly feeling, cut my window and lined it with the scallop border die-cut. Then added the bubble sticker title and cute little snowflake stickers.


On the inside I used Toy Shoppe and then added Mr & Mrs. Claus peeking out the window. I put the rest of the scallop border under the fun Hohoho sticker, then added a couple more die-cuts and stickers to the other side to finish it off.
 It's so fun and cute! I always know I've scored when my kids come up and exclaim excitedly over something they find laying on my desk. :)

Thanks for stopping by. I would love for you to become a follower.
:)Ange

Saturday, December 14, 2013

Christmas cards w/ BasicGrey

 I have some cute, simple Christmas cards for you today!


I've been having a lot of fun making Christmas cards this year and using the Basic Grey's 25th and Pine line has made it so easy.


 For this card and used this pretty pine tree chevron printed paper with edges inked in dark green, I love it!  Then I picked one of the banners. Because they're made for a 12x12 page I had to snip it down to size. I just snipped the string in the middle of the banner next to the ones I wanted, then unpicked the string from that banner so I could use it somewhere else. I added a couple of the cute brads, wooden snowflake and the chipboard letters to finish off my card.


 This card is where I used the banners that no longer had string through them. First I flipped them over and closed up the string holes with my fingernail. One banner is used as a tree here, 2 at the top and then I wanted some quick presents so I actually cut them out of a different banner. I also used another pp for my background, inked in dark green again, then used a punch on a different pattern for the top piece and added one of the super cute stamps and a wooden star. Oh and that cute chevron print for the tree trunk.


This card was probably the easiest. I used the snippets card, inked in black, for the bottom and added the Joy letters. Then layered some washi tape across the top, attached the Holiday wooden word and another cute stamp.

Happy Holidays!
Ange Weisbeck

Tuesday, December 10, 2013

A layout & a card w/ Echo Park & NAS

  And we're off! Tis the season to be merry, bright and decorating right? 
Which is why I decided to scrap this cute photo of my husband lifting our youngest to put the angel on the top of the tree. He was so adorable waiting to put "Cinderella" at the top.


 I used Echo Park's Reflections Christmas line & sketch #294 from Nuts About Sketches for this layout. Here's a couple closeups and the sketch:


Then I put together this card using the easy project life style papers in the kit.


I hope you're enjoying your holiday season!
:)Ange

Supplies:
Echo Park - pp, stickers
Nuts About Sketches - #294
twinery - red twine
colorbox - black ink
stampin up - markers
zig - black pen
uniball - red pen
ek success - foam adhesive
tombow - tape runner
stash - washi tape, white cs, craft knife

Thursday, December 5, 2013

Disney w/ Moxxie

 Hi!
It is COLD here. I hope you have warmer weather where ever you are.
I have this fun layout for you today. Thinking about warm trips to Florida helps a little right?


Umm, yeah those pictures are that old and I just scrapped them.... I was just waiting for the perfect line! 
This was our first day at the parks on our trip and believe it or not, it rained in Florida. lol Being from Idaho, it was different to get used to all the moisture, but I have to say, I love a warm rain and so did my kids. My son had to go out for a spin and these cardstock stickers were just perfect for my layout.

This layout is up on the Moxxie blog with all the details and a chance for you to win this awesome line.

Thanks for stopping by!
:)Ange

Wednesday, December 4, 2013

Dear Santa w/ Basic Grey & DCWV

 Hello!
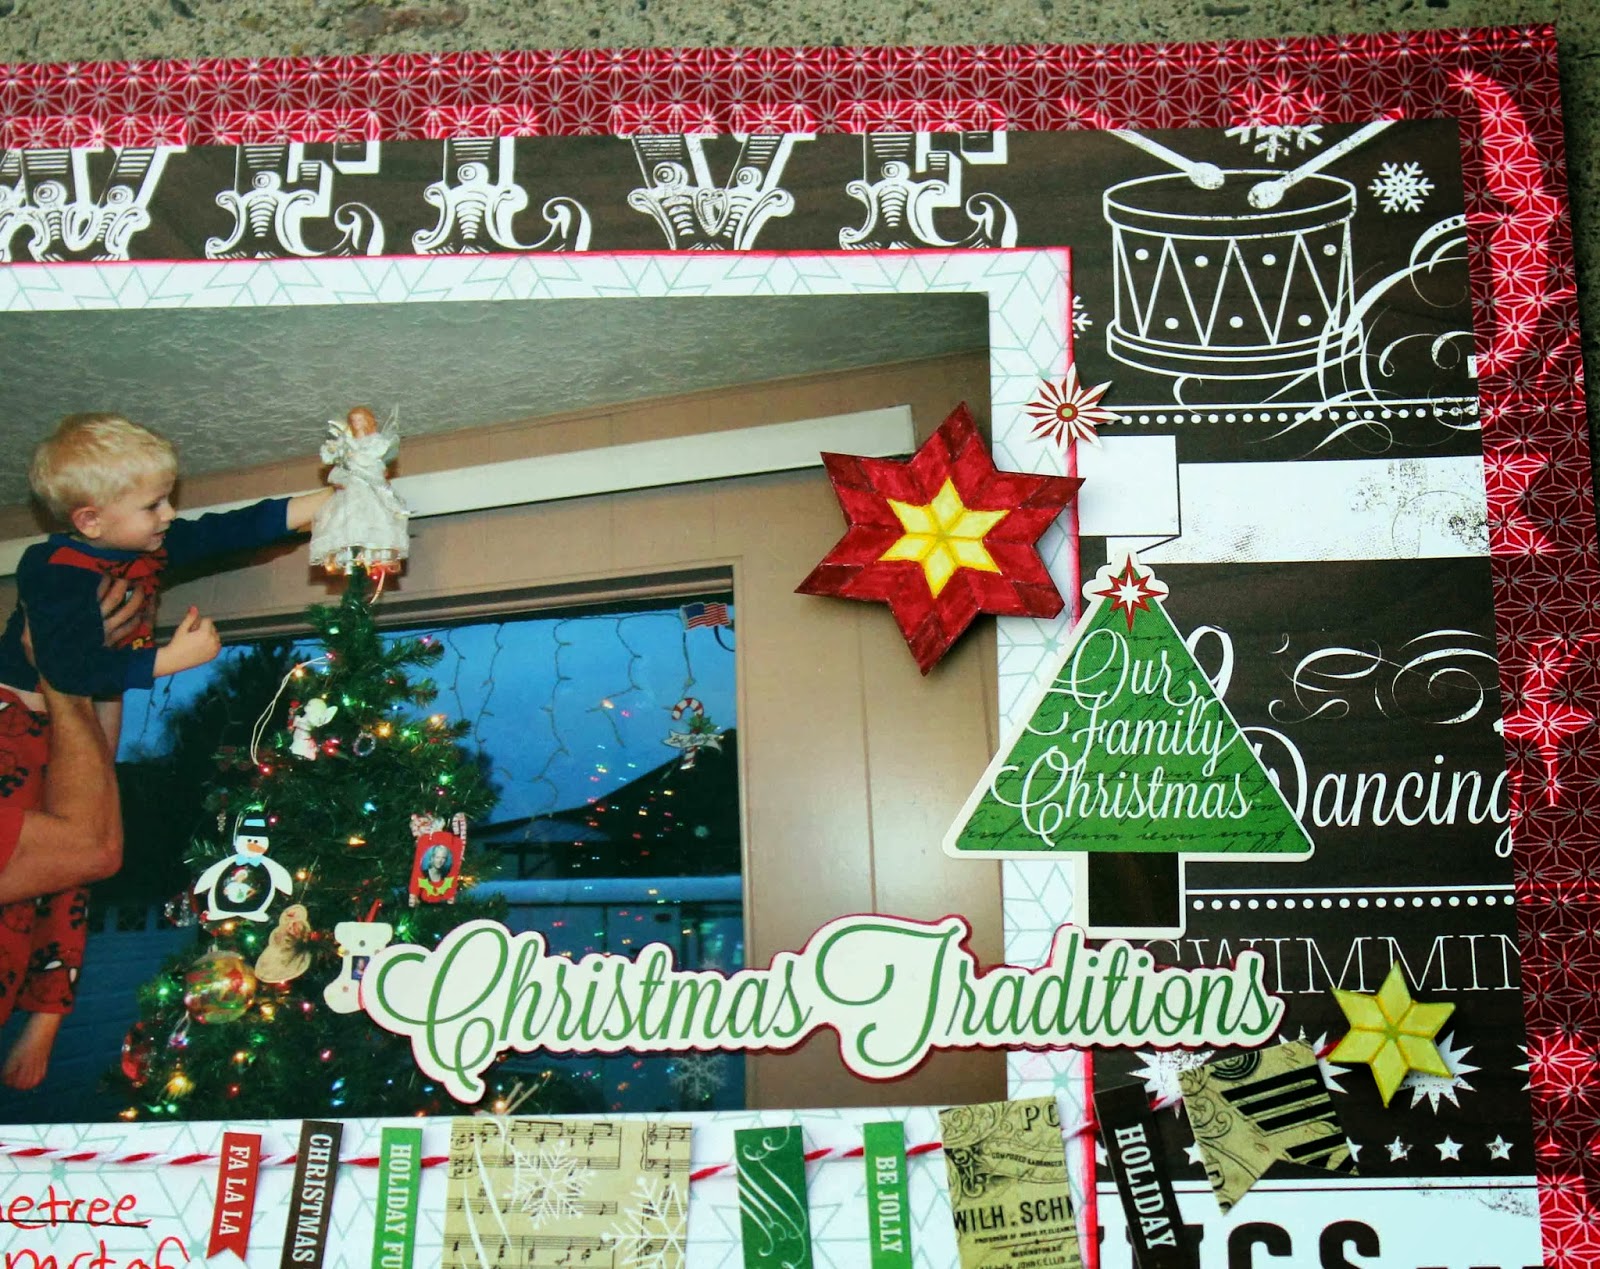
It's that time of year again! Are you ready for Christmas? I'm not, but I am ready to scrap some fun Christmas memories!!! There's just something special about watching the little guys meet Santa isn't there? I love the mystical/magical feel of it.
 

My son was so excited to meet Santa last year, but so overwhelmed at the same time. It was just super duper adorable! This 25th & Pine line from Basic Grey was perfect for these cute photos.
 I received a lot of embellishment packages, but just a few 6x6 papers. So there is only one (yes I said 1!) 6x6 paper on this layout.

 I started with a background sheet from the DCWV Holiday Glitzy Glitter stack. I love that its so glittery and shiny but it does not come off when you touch it! Wonderful!! Then I laid out my photos and picked this cute journaling card that I knew belonged on this layout. It was a little long for the space I wanted it in. So I cut it off along the striped piece, moved it up to wear it fit on the paper and looked good, then glued it back down.


From there I decided this fun 6x6 pp was perfect. I love the navy, red & pink combo. Its such a pretty and fun twist on the traditional holiday colors and I feel like even tho this is a boy layout the pink works perfectly for it. I knew I wanted the largest section of my pp along the bottom, so I've got a piece that's about 3x6 down there and I cut the rest into 1 inch strips and laid them out around the photos.

It worked perfectly leaving a space in this upper left corner for a title strip that I cut out of the snippets package & attached using foam adhesive to add some dimension. Again that red and pink combo was perfect so that's the banner I chose. I snipped it apart where it was going to hang behind the journaling card to make it a little longer. I wanted to attach it higher up on my layout but still have it hang below my photos. After that I added the fun brads, wood veneers and some liquid pearl dots for a bit of sparkle. 
Here's a quick look at the whole layout again:
 

It's amazing what you can do with a 6x6 pad of paper and some fun embellishments, isn't it? Thanks so much for stopping by! I hope you enjoy some magical moments this holiday season. :)Ange

Supplies:
Basic Grey - pp, journal card, banner, wood veneers, brads
DCWV - glitter bg sheet
ranger - liquid pearls
tombow - tape runner
elmers - glue dots
ek success - foam adhesive

Fairy Dust