Showing posts with label stars. Show all posts

Saturday, July 1, 2023

Softball Game Day layout

 Is it really July?
I'm ready for a camping trip or something.


The challenge for Scrap Our Stash was to use the sketch and red, white, and blue.
I went with a baseball line that was mostly red, white and blue and added some softball stickers to represent fast-pitch for this layout of my daughter playing her favorite game.

Check out the challenge here & play along to win.
Angela


Thursday, June 29, 2023

Life Documented layout

Hello!
How is your summer going? I hope you're getting in a lot of fun or relaxation, or both.


Today I'm sharing a layout for Creative Embellishments.
I used this cool Life Documented chipboard title and added a rainbow of gel crayon color to it.
I LOVE the way it turned out.

More details on the Creative Embellishments blog here.

Thanks for stopping in!
Angela


Thursday, October 27, 2022

Spooky Night layout

Happy Spooky Season!

I really can't think of a better way to spend my crafting time than to be making Halloween layouts. They're just so fun!

I created this layout using a sketch by Rochelle Spears and a tic tac toe challenge from Scrap with Stacy.


The sketch was super fun and easy to build off of and for the tic tac toe challenge, I used Orange/black, 4 photo & ink splatter.


Thanks for creeping in today!
Have a wonderful Halloween season.

Angela


Saturday, July 16, 2022

Loving this layout

 Hello!
Back with another challenge from Scrap Our Stash today.
Here's my layout based on the sketch provided and the challenge to add stars:


Here's the challenge:


I'll be back next week with another layout using Creative Embellishment products.
Have a great week!
Angela

Friday, June 17, 2022

A little Dirt Never Hurt layout

 Happy day to you all!
Today I'm working with products from Creative Embellishments.


So this entire layout is based around the title piece from Creative Embellishments; A little Dirt Never Hurt.
I found the perfect photo with my son shrugging his "what?" at me, grabbed a sketch by Dee Hunt and the rest of the layout really created itself.
Here are some closeups:


I used a lot of brown ink all over the layout and chipboard pieces.
The gears that help the title piece pop are colored with silver metallic marker.
I think my favorite part, after the title, might be the wood veneer mushrooms. They're just so cute!

Thanks! :)Angela

Friday, June 10, 2022

Dad layout

Hey there!
Father's day is coming up and I have a fun layout to share with you.


I enjoyed creating this layout so much!
I love the fun, goofy photo of my husband with my kids climbing all over him and that made it easy to just add elements and decorate until the layout was full of fun too.

I used lots of pieces from Creative Embellishments, including a starburst stencil for the background.
Here are a few detail photos for you:


Thanks so much for coming by today.
Wishing you a happy week.
:)Angela


Wednesday, June 8, 2022

Dude! You rock

Hello!

Today I'm using a sketch from Sketches In Thyme. I've turned the sketch to fit my photos better.


 My son enjoyed going to soccer camp quite a bit. He loved the scrimmages and the competition. He's a serious competitor but does so well with the team aspect.
Love this kid.


Thanks for stopping in!
:)Angela

Monday, May 23, 2022

Pancake layout

 Hello!
I have another fun sports layout to share with you today!


These photos have both my daughters in them. It was really fun to watch my oldest 'teach' my youngest a little about the sport she loves and enjoys.
My oldest is on the left demonstrating a Pancake and my youngest is on the right practicing it.

I used a lot of awesome Creative Embellishment products on this layout.
I spruced up some of my stars with my gel crayons but left the wood veneer stars and volleyballs naked.
I also used a sketch from Sketch N Scrap.

Here are a few closeups:


Thanks for popping in today!
:)Angela


Saturday, April 9, 2022

Run! layout

 Hello again!
Today I'm sharing another layout created with Creative Embellishment goodies!


This was a trip to a nearby dinosaur museum a few years ago.
I'm not sure I have a serious photo from this trip but it was so much fun!


I started out picking the dinosaur from the chipboard pack that I wanted to go with my layout and then I used some ink to edge them with a bit of definition.


Then I went with my title and had fun letting the pterodactyl take off with one of the letter.
Last I added some cool wood veneer stars. The picture in the store does not do them justice. I love the dimension you get because they're so thick!

Thanks and have a great weekend!
Angela W


Wednesday, March 16, 2022

Talk Wrestling layout

 We're getting a bit more sunshine around here and it feels fantastic!
Love me some sun and warmth.


Today I'm sharing a layout made for Scrap Our Stash challenge:


The challenge was to use the following sketch with circles on your layout.


Sometimes when you're looking at a sketch the colors or elements they use to design it can limit the potential you see in the sketch. That's one of the reasons I always turn my sketches to black and white. I find that color on a sketch is one of the most distracting things for me. But beyond that sometimes you can see flowers or hearts as embellishment place holders and it makes you think of certain photos or themes.
As you can see I change that up quite a bit too. My go to for embellishments are stars. I feel like they go with almost anything and I love them.
They were perfect for this photo of my son and husband watching and discussing their favorite sport; Wrestling.

Thanks for stopping by today!
:)Angela


Wednesday, February 23, 2022

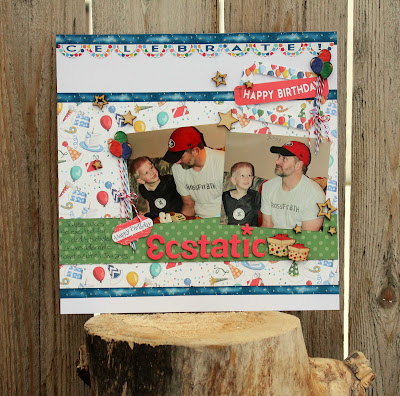
Ecstatic layout

Hello!

 I'm back this week with another fantastic layout using the awesome Creative Embellishments wood veneers!


These pictures of my little man just brimming with excitement for his dad's birthday were just too tempting. I'll get to the other birthday photos eventually...

Look at that face!
How can you resist, right?


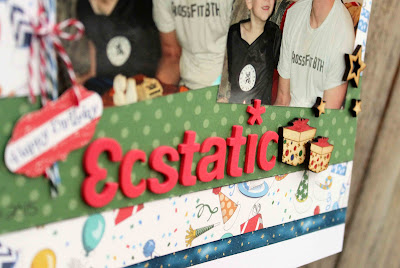
So I started with the title. Knowing I would need something bold I looked for my red thickers. Of course none of them had the letters I needed so I improvised. The E is a 3 and both c's are q's that I cut the long side off of.

Then I started working with my wood veneers from Creative Embellishments!
So easy to color with markers or you can just leave them because they're awesome naked too!!
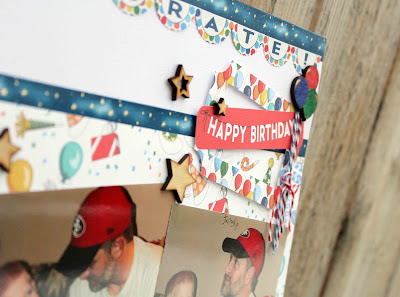
When you need to check a color just flip the piece over and make a little mark on the back. Super easy and they look so good.


I did the same with my balloon groupings and then taped some twine to the back of each piece and tied the strings together in the front with another piece of twine.

Thanks so much for stopping by today!
:)Angela


Fairy Dust