Showing posts with label birthday. Show all posts

Thursday, November 9, 2023

Happy layout


 Hello and happy November to you all!
Today I'm sharing a birthday layout.
In my family we have a couple of birthdays in November so I always have a lot of photos of present opening this time of year.
This layout, however is about my daughter making cupcakes for her birthday.


So for this cute layout I used a sketch by Rochelle Spears and the first thing that grabbed me was the banner in the corner. I knew the Happy Banner from the Birthday Fun wood veneer set would be perfect for this layout.
I also used the cute little party hat over the photo of cupcakes.


For all of these pieces I used markers to color and add details.


These fun candles are from the Birthday Candles chipboard set and my Happy Birthday is from the Small Sentiment Words set.
I used markers to color these too and to add the polka-dots to the candles.

I hope you have lots of fun family time this month and time to scrap a few of those moments too.
Angela


Thursday, September 21, 2023

Celebrate layout

Today I'm getting into the weeds with some birthday photos!
Everyone has those photos that for whatever reason they just don't dig into for scrapping often right? Well, these are mine. But today, I have this fun layout to share:


I think it turned out pretty good.
Check out the details on the Creative Embellishment blog.
Thanks, Angela!


Wednesday, May 17, 2023

Birthday Bash layout

Hey everyone!
Today I'm sharing this fun Birthday Bash layout for Creative Embellishments.


I used a sketch from Sketch n Scrap and lots of fun chipboard from Creative Embellishments.
You can find all the details here.

Thanks for stopping by!
Angela

Wednesday, February 23, 2022

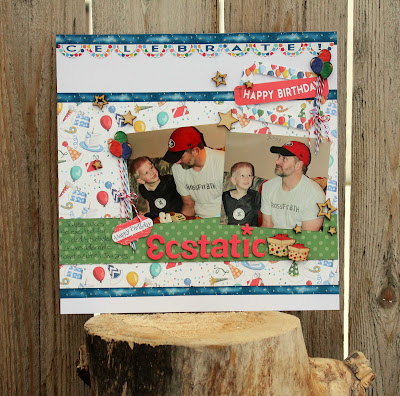
Ecstatic layout

Hello!

 I'm back this week with another fantastic layout using the awesome Creative Embellishments wood veneers!


These pictures of my little man just brimming with excitement for his dad's birthday were just too tempting. I'll get to the other birthday photos eventually...

Look at that face!
How can you resist, right?


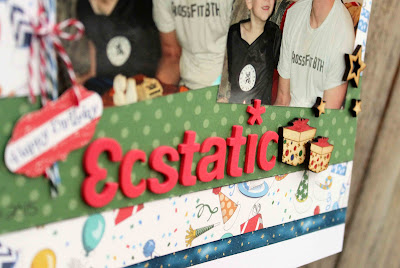
So I started with the title. Knowing I would need something bold I looked for my red thickers. Of course none of them had the letters I needed so I improvised. The E is a 3 and both c's are q's that I cut the long side off of.

Then I started working with my wood veneers from Creative Embellishments!
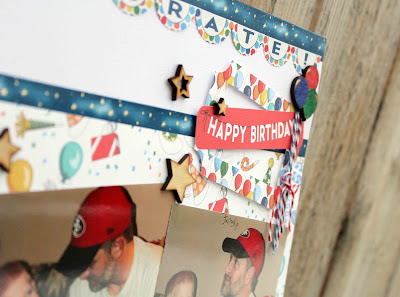
So easy to color with markers or you can just leave them because they're awesome naked too!!
When you need to check a color just flip the piece over and make a little mark on the back. Super easy and they look so good.


I did the same with my balloon groupings and then taped some twine to the back of each piece and tied the strings together in the front with another piece of twine.

Thanks so much for stopping by today!
:)Angela


Monday, March 2, 2020

Party layout

 Hello, hello!

I have a fun challenge to share with you today. It's from Scrap Our Stash:


And here is my layout


I'm generally not too good at color challenges but found this fun birthday line in my stash and thought it worked perfectly. I added the Animal balloon sticker for the item that starts with the same letter as my name.
I'm also not very good at getting birthdays scrapped so this was a great challenge for me.

Here are some closeups:


Thanks for stopping by!
:)Angela

Tuesday, June 19, 2018

Happy Day

 Hey there!
Popping in today with a fun layout I did using a sketch from Sketch-N-Scrap.
Here's my layout:


And some closeups for detail:


I used the latest kit from The Scrap Room and had a lot of fun with the embellishments that came along with the kit. I also dug into my stash for these flower brads.


Thanks for stopping by!
:)Ange

Sunday, July 2, 2017

Yeah!

A little bit of weekend fun using the sketch from Elle's Studio:


I created this fun layout:

 I made my own star template to spray the stars on my background, pulled out my Elle's Studio papers and picked one to back my photo.


Then I added some fun Elle's embellishments along with the labels and washi tape

The fun part of my title was that I had these letters sitting their already colored from a previous project, so I put them to work here and it was perfect.
Thanks for stopping by!
:)Ange

Friday, May 29, 2015

Happy Birthday card w/ LMT

 Here's a fun and quick birthday card.


I started with a white base and added a layer and a half of Red & Blue triangles tape from Love My Tapes to the top by layering it over itself. It makes me think of a fun banner.
I followed that up with a cute Happy Birthday tape.
Then I layered the Blue Stars tape, traced a large star onto it and used an exacto knife to gently cut through the tape. Peel the extra tape up and you have your star.


To finish it off I used Moxxie's red alpha for the 12 and cut some stars from the blue tape and a similar yellow tape to add as embellishment, along with a bit of doodling and inking.

Thanks for stopping by!

Monday, March 16, 2015

2 cards w/ Kreaxions & Moxxie

I am super excited to announce that I've joined the Just Imagine Kreaxions punch team!
My first post went up over the weekend and now I wanted to share here.

I have 2 cards for you.


This first card is a baby card, but with St. Patty's right around the corner I thought it would be fun to give it a "lucky" theme. I started with a white cardstock background, then used the Kreaxions #311 punch along the top and bottom of the green paper from Moxxie's Winery line, after I splattered it with a bit of green mist. I did the corner punches first, then, eyeballing it, I could tell that I wouldn't have room for 3 full punches across, but I didn't want to leave a ton of space along there either. So I decided to use the dots on either side of the flower to help me line up the punches to fit 3 along each end. Just turn the punch upside down, start in the middle and work your way out.


Next I used the wood grain pattern under my sentiment block. I used Kreaxions #901 Butterfly punch for this. I didn't use any of the positioning pieces. Again I just turned the punch upside down to see where I was punching my paper. Then, because I just wanted that fun pointed border for this card I covered the butterfly and bursts with the lighter green sentiment block.
From there I hand cut some hearts to make a clover, then added some Moxxie alphas and stamped my sentiment.


Next I have a birthday card for you. Using the same Winery line and white cs base, I used Kreaxions #309 punch along the bottom of the green pp.


I added some purple inking around the papers to make them pop a little more and even inked the flower punch outs from the back a bit to make them pop a little more.
I finished up with some stickers & barcode strip from the line and then added the fun stamp sentiment.

Thanks so much for stopping by!
:)Ange

Monday, January 5, 2015

NAS Monday

 Hello!
Today is Nuts About Sketches day.
Shawn has provided this fabulous 2 page sketch:


And I chose to do the left side of it with some pictures of the cute cake my daughter decorated for her dad's 40th birthday.


My mom enjoys baking goodies and my daughter had so much fun decorating this with all of the things my husband was into that year. Crossfit and running, I think she got it all, including a fun reference to a popular song at the time. lol


This Christmas the same daughter gave me some fun scrapping goodies that I put to use on this layout.
 

All of these cute patterns are from the pad she gave me. I used brown ink to keep with the kraft look of the papers, then added a few glam rocks for a bit more fun.

Check out what the rest of the design team has created on the Nuts About Sketches blog.
Thanks for stopping by!
:)Ange

Wednesday, September 3, 2014

Hello cards w/ Kaisercrafts

 September already? Someone push the pause button!

I have a couple cards for you today using Telegraph Road from Kaisercraft. One of them I did make into a birthday card for my mom, but they are both really general on the front, so you can do whatever you wish when you're ready to send them.

First up:


This is the one I turned into a birthday card. I started with a white cardstock base. Then I used the 4x6 pocket page card from Receive on the front and took one of the 3x4 ones from Parcel and cut out just the "Hello Sunshine" portion of it to add as a sentiment. I rounded a couple of the opposing corners before sliding it under the portion of the flowers that I fussy cut, so they would sit on top. Then finished up with some clear stickles. Inside I just added a Happy Birthday sentiment with a stamp and then wrote in it. 

Next up:


For this one I started with a white cardstock base then added Letter to it after punching the borders. I then used another 3x4 card from Receive to add over the top along with the Hello banner and a couple of Irocks from Imaginisce to glitz it up a bit. Add your sentiment inside and you're ready to mail!
Happy Scrappin'!
:)Ange

Fairy Dust