Happy New Year!
New Year, new sketch right?
Today I'm sharing this layout based on the sketch from SIT:

Check out there fb page and play along!
Angela
Happy New Year!
New Year, new sketch right?
Today I'm sharing this layout based on the sketch from SIT:
Check out there fb page and play along!
Angela
My last post for the year!
I can't believe it.
But I'm ending on a fun one for sure:
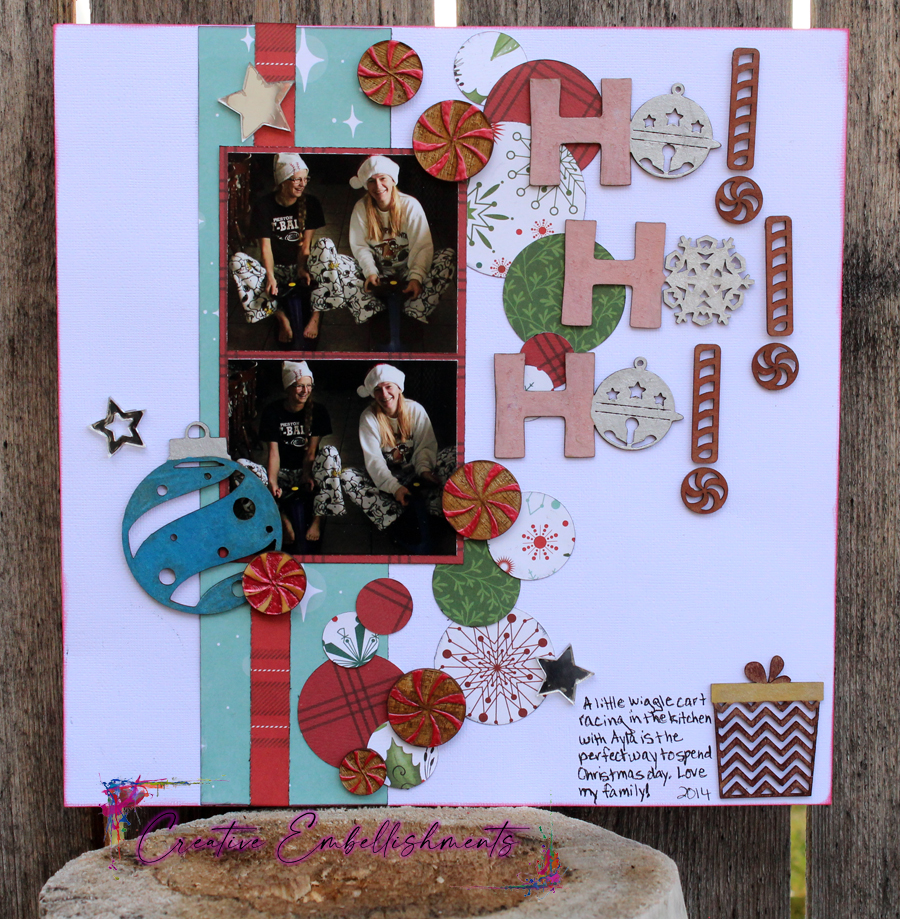
Moments like these are the best!
I don't get to scrap them very often because I'm usually the one behind the camera so I really, really love that someone thought to grab the camera and take pictures of my "racing" my daughter on the new wiggle carts we got for Christmas. So much fun!

For all of my H's on my Ho!, Ho!, Ho! title I used metallic chalk marker, on the bells I used the same in white and then for the snowflake O I used the matte white chalk marker. For the ! I used red ink pad.

This cute little present is from the Gifts Set 3.
I used ink pads and gold metallic marker.
Don't forget the magical touch of a few acrylic stars to really get some pop on your layout!

To finish up I had this super fun Spiral Bauble and used the blue metallic chalk marker with some silver for the top piece. Then I added a bunch of the wood veneer Peppermints with just a touch of red liquid pearls to give them some more color.
I hope you have a fabulous holiday and get to spend lots of time with your loved ones doing whatever it is that makes your heart happy!
Thanks for stopping in!
Angela dt
Hello!
I have a fun one today.
Every now and then I remember to get myself in a photo and this night I took one with my husband once we got back to the car. I really love how this layout turned out. I hope you like it too.

I really, really LOVE this little Scrawny Tree and how it represents the best of Christmas.
Way too often Christmas is commercial and I'm super over it, so this tree and the quote from Charlie Brown was perfect of this layout.
I used markers, chalk marker and just a touch of liquid pearls on my tree.

For the word Treasure from the Small Moments Border Words I used metallic chalk marker.

And my title piece is from The Little Things set.
I used ink pads to color it.
Then I added the fun Mini Holly and used liquid pearls to decorate it.

Thanks so much for coming by!
I hope you have the best people around for your holiday!!
Angela dt
Last month of 2023 are we ready?
Don't answer that!
But I'm always up for a fun layout:

We have lots of sitting on Santa's lap photos right?
So here's one way to scrap them.

I've used one of the pieces from Santa s Sleigh set for this.
I just left the chipboard naked because it's perfect with my layout!
Then I added some of the awesome acrylic Silver Stars.

Here I've used the Presents border and Whimsical Trees 3.
I wanted to use the acrylic silver stars to decorate my tree, but I didn't have enough small ones left.
I think I will buy some more and use them on a layout in the future because that would be a fantastic way to decorate a tree!
Thanks for spending some time with my today!
Angela dt
Hello!
It's the last month of the year!
It's so hard to believe. The years just keep flying by faster and faster.
Today I'm sharing this fun layout based on a sketch from Sketches In Thyme.
Check out their fb page and play along!

Thanks!
Angela