Sunday, October 29, 2017

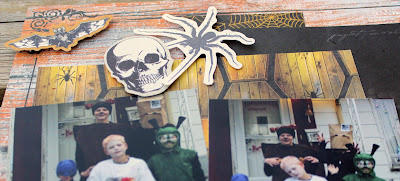
I'm Batman

 In your best Batman voice "I'm Batman."
Love seeing my little guy all dressed of for his Pre-school party.
He had so much fun!


I used Oct's TSR kit and their sketch for this layout.
Here are a couple closeups:


I used foam adhesive to pop up my bats and star for a bit of fun.


Here you can see I used washi tape for some of the layers and added my journaling with chalk marker.

Thanks for stopping in!
:)Ange

Wednesday, October 25, 2017

Xmas card

Last but not least:


Used up some scraps with this one and love the way it turned out.
Thanks for coming by today!
:)Ange

Make card

This card is made using the regular month's sketch from Sketch N Scrap:


#107
I was planning this for a wedding card but thinking it might work for other things too.
Thanks!
:)Ange

Season card


Might as well get some Xmas cards done right? 
I think this one is my favorite.

Thanks for dropping by!
:)Ange

True Love

I've got another card using a sketch from Sketch N Scrap:


Simple but gorgeous.
Thanks!
:)Ange

Happy Birthday

Oct. is World card making month and Sketch N Scrap has been posting lots of card sketches.
Here's what I've did with the first one.


I turned it horizontal and added a bet more embellishing.

Thanks for stopping in!
:)Ange


Tuesday, October 24, 2017

Adore

We try to go to this fun Oct. event every year called the Pumpkin Walk. This particular year they had this fun set up and we put the kids in there together. Our oldest and youngest loved it and thought it was fun. But our middle two are too close in age and they did not think it was much fun. lol
 

It made for a pretty funny picture though.
I used a sketch from Sketch N Scrap and this fun kit from The Scrap Room.
Here are a few closeups:


Thanks for dropping in!
:)Ange

Sunday, October 22, 2017

Peace amidst Chaos

Do you ever find yourself searching for a little peace amidst the chaos?
That is exactly what I thought of when I saw this scene on our trampoline. These kiddos make me smile on a daily basis.
They are my Peace and my Chaos. :)


I created this layout to go with this month's sketch challenge from Scrap Our Stash.
Along with the sketch you need to use one item on your layout for each letter of the word LEAF. I used: L- leaves wooden, E- Echo Park stickers, A- Autumn colors, F- Fall collection from EP

Here's some closeups of my layout:


I love it when I think of a title that fits the moment so well and stands out like this one.


I spritzed the Love This Moment cut out to make it blend with my layout a bit better. The straight white was commanding too much attention before I did this.
I also colored some of the wooden pieces with marker.


This sketch had a lot of layers and I really like how they all stacked up.
Thanks for coming by!
:)Ange

Thursday, October 19, 2017

October 31

I have some more spooky fun today!
Check out this layout:


I used a sketch from Sketch N Scrap and had so much fun with this layout. 
Here's some closeups:


I kept this one pretty simple and let a few embellishments and these awesome papers do all the work for me. With the exception of my red ink. Gotta have the ink!
Thanks for dropping in!
:)Ange

Crazed Pillow Pet

It's the most wonderful time of year!
Halloween time!!
I love this time of year and I love creating creepy projects. I was just telling my friend the other day that if my hands aren't stained red with ink this time of year then something is wrong. lol
So today I have a creepy fun layout for you:


This particular year my daughter dressed as a pillow pet, which was actually quite adorable, but when she pulled this goofy face on the other side of the screen door from me it actually turned out to be a spooky photo. So I went with it. 
I based my layout on the sketch from Let's Get Sketchy and used lots of products from Oriental Trading.*


I started with my base of white cardstock, then added these yummy glittery washi tapes. I picked these 2 creepy patterns from the Halloween paper for my photo accents and attached them to the background. Then I added my red ink and made some of the drips run down my page. After that it's just about the accents. This fun Halloween snap bead and eyeball charm are both from Oriental Trading.*


I added another eye charm with my title and finished up with these cool black potion bottles.
I had so much fun creating this layout and just love the creepy feel it gives off. 
Thanks for joining me today!
:)Ange


*Oriental Trading sent me products to review, but all opinions are my own.

Saturday, October 14, 2017

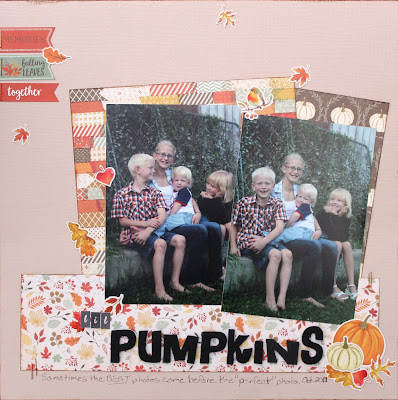
Pumpkins layout

 Hello!
I guess its time to start getting into the fall season. I have to say, altho I LOVE Halloween, I definitely miss summer when it's gone. But today I have the perfect, cute Fall layout to share with you:


My layout was based on the awesome challenge from Scrap Our Stash, called the tic-tac-toe board challenge:


You just use 3 items from the board in a horizontal, vertical or diagonal row. I started with the middle column and ended up with most of the board on my layout. So if you're looking for a challenge to start with that's easy. This is the one!
Here's a few closeups of my layout:


Don't forget to enter your take on this challenge at the Scrap Our Stash blog and be entered to win a prize! Thanks for stopping by,
:)Ange

Friday, October 13, 2017

Halloween Tombstone Banner

 I am super excited to share something fun with you today!
I LOVE Halloween and I love that I got to play with some cool Oriental Trading* items this month.
I picked a lot of Halloween items and made this awesome banner for the wall in my living room:
 

I hung everything right above my photos, its a little crooked (and so are my picture frames) but I figure that just adds to the spooky Halloween feel. 

Here's the details on how I made it:


I started with these fun wooden tombstones and inked the edges and a bit on top in black.
Then I laid them on the back of my Halloween paper and traced around them. Cut the paper out, squish it in your hand (don't worry if it tears a bit), flatten it out by hand then ink over the creases to create the weathered/cracked look.
Slather your tombstone with glue, I used Mod-Podge, and put the paper on.
You can do all of them while you're waiting for them to dry, it doesn't take long if you make it a thin layer of glue.


Then you can do a bit of sanding around the edges and over the front of the tombstone. If you take off more than you want just blacken it up with your ink again. Then give it another coat of Mod-podge to seal it up.


Now for the details.
I cut out some chalk paper to add to the front of my tombstones to write on. Then added the decorations. The skull and crossbones were punched from the Halloween paper and I cut the bats, a jack o' lantern and the big spider out of one of the papers.


Here you can see the bats that I attached to thin craft wire before taping to the back of the tombstone and the Jack O' Lantern I cut out. 
I also used one of these awesome black potion bottles to add to the spooky effect.


This is a side view so you can see the 3-D effect better.
 

On 3 of my tombstones I used these awesome Eyeball charms and these fun Halloween snap beads

My favorite tombstone? Probably the most simple looking, but it did take a bit more work to get the look I wanted:


I cut this big guy out of the paper using a craft knife. I used 3D foam to pop him off the tombstone and then bent his legs at the sections and glued the tips down for a 3D look.
Here's a closeup:


And here they all are. If you decide to set them up on a mantle they come with these easy to use bases:


Putting it all together on my wall, I used wide burlap as my base, added some cool spider webs and then these big spiders. They were the perfect touch for this piece. I finished it up with a creepy message using the Chalk Marker.


These were SO much fun to make!
They are awesome and spooky. Everyone in my family commented on them when they came home. lol You know it's good when the teens like it!
Check out Oriental Trading* for all your supplies.
Thanks for stopping by,
:)Ange


*Oriental Trading sent me products to review, but all opinions are my own


Monday, October 9, 2017

XCountry treat Halloween style

Hello!
Making team treats is a lot of fun, but making them with AWESOME Halloween themes is totally up my alley. I showed you the box of fun items I got from Oriental Trading* last time, but here it is again to refresh your memory:
 

 This time I took those cute little orange treat boxes (they come in so many fun colors!) and made this for my son's Cross Country team:


I was making a lot so I did a sort of assembly line. But first I did a box in each stage and took a photo so you could really see what was going on and how simple this was. Which was good because there are a LOT of runners on a XC team! lol:


I've labeled each stage in the photo above for convenience.
1- This is how the boxes come with orange ribbon pre-cut.
2- I folded each box to open them up, added a bit of the fun Halloween washi tape and then trimmed the sides along the box's edge with my scissors. 
3- I used my computer to put a little label on the treats. It says "Freaky Fast Fuel"
4- I have this awesome skull & crossbones punch. You bet I put it to good use with the cool patterns from the Scrapbook Paper Halloween mix.
5- Add your treats and fold up the bottom of the box.
6- Push your ribbon thru the holes and tie it up anyway you want. I put a little slim jim in there for extra fuel for the runners.


This washi tape is so cool! I love that with these little pieces I was able to get so many different looks on each box. I couldn't decide if I liked the lit jack-o-lanterns in the tree or the bare tree w/ the bats better.


My son said the runners were all surprised and super excited to get the treats.


And here's my runner. This is his first year running. It's really cool to watch how much he improves each race. Especially since I am NOT a runner. lol

Hope you like my little treats.
Thanks for stopping in!
:)Ange


*Oriental Trading sent me products to review, but all opinions are my own.

Sunday, October 8, 2017

She is FIERCE!

 Hey there!
Today I'm sharing my layout based on this fun sketch from Sketches In Thyme
here's my layout:


I stayed pretty close to the sketch but put my own fun twist on my layout. I like to use pretty papers and "girly" embellishments on these strong layouts of my girls doing their thing.
This particular layout is about how my younger daughter uses her smaller size to beat the opposition.
Here's some closeups:


I used a pen to make my stitched circles


Making these banners are easy. Just a bit of washi tape folded over the twine and stuck to itself and then you cut the end.


Of course, my favorite part (besides the photo) is the title. Love my 'little' girl!

Thanks for stopping by!
:)Ange

Sunday, October 1, 2017

Spooky soccer team treats!

 Hey there!
I am SO excited to share with you today.
I recently received a box of goodies from Oriental Trading* and I've been working on a few projects with them. Today I'm sharing one of those with you.
First here is the awesome product* I got to work with:


Fun right?!
Well I started off with some super cute and spooky treats for my son's soccer team.
It was perfect because their jerseys are purple so their coach named them the Purple Minions and doesn't that just scream Halloween?


Of course these adorable little pumpkins are the place to start. I put a little treat in them and then cut the awesome scrapbook paper into strips and made banners. On one side I wrote "Carve a path to the" and the other side I stamped "Goal"
Then I used the too cute washi tape to add 2 more banners to each pumpkin.
You just tear a piece of tape, wrap it around the handle, stick it to itself and then cut the ends into banners.
This is how they turned out:


Super cute, fun and EASY!

Next up was a drink. 
All little soccer players need a drink after the game so I picked up some grape gatorade 
a.k.a Purple Minion Monster Juice!


I wanted multiple layers, but wanted to keep it simple. So I used my printer to print out these little labels on white cardstock, using a font that was already on my computer.
Then I layered the white label onto the green polka-dot paper that I had punched and inked in black.


For the purple polka-dot I measured my paper into 3 x 9.5 inch strips to give me enough room to use good adhesive to keep them on the bottles. Then I punched these, inked them in black and attached them to the bottles. If these were older kids or adults it would be really fun to tear the paper and use red ink for a bloody look.
Here's how they all turned out:


And here's my super cute and happy little Purple Minion:


He and his teammates LOVED the treats. They were a big hit!
Thanks so much for stopping by today.
Come back soon and I'll have more projects to show you from this awesome product from Oriental Trading.
:)Ange


*Oriental Trading sent me products to review, but all opinions are my own.

Fairy Dust