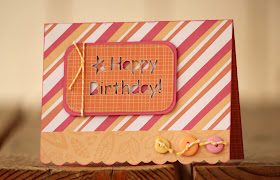
Saturday, June 29, 2013

A day 4 Play! with Moxxie


 Hi! Today, I want to show you a quick layout with this fun and vibrant line called Child's Play. You can see the whole line here. I just love this line, it has the perfect mix of colors for any of the fun outdoor photos you're taking right now. I picked some random photos from my daughter's birthday party with a couple of her friends to put on this layout. Who knew my son's little car would be such a big hit? lol
 Look how nicely the colors go together:


I chose the yellow pp as my background so the photos would pop more and I just love that I have all of these green and red stickers and die-cuts to choose from to add to the layout!


I made a few pinwheels to put on the layout for a bit of whimsy. They are fun and easy.


I also did quite a bit of distressing with my scissors on both the photos and the die-cuts.


Don't you just love this line?! What would you make with it?
Thanks for stopping by today. :)Ange

Supplies:
Moxxie - pp, stickers, die-cuts
imaginisce - glam rocks
cutterbee - scissors
ranger - ink
zig - black pen
stampin up - brown marker
tombow - tape runner
stash - brads

Tuesday, June 25, 2013

Cards, cards & more cards

 I brought this super cute stack home from the Expo with me and it was just screaming for cards!


 I love that all the papers are double sided and have this fun scalloped edge along the bottom. Great for making super cute cards really quickly. I made a wide variety of cards leaving the scallop along the bottom for most of them.

On these two I used my brand new silhouette. I just played with it a bit to help me learn some of the functions. Lots of fun!


 For these two I cut elements out of the design of the paper to add to the front of my card for a little more interest.


 These last two are a little bit different but I added some SRM stickers to both of them and flowers w/ Imaginisce gems (got them at the Expo!) for this top one.


This last one I wanted to be a little more elegant so I cut the blue strip off the bottom to leave the card white/off white, punched the bottom and then added the stickers and washi tape.


I hope you enjoyed seeing my cards and hopefully they inspired you a little.
Thanks! Ange

Monday, June 24, 2013

Yankee Doodle Dandy

 I have a super fun line to show you today! This Hometown Celebration line from Moxxie is perfect for your patriotic or summer photos. I love the rustic blues, reds and whites, perfect! Today I used this sketch from Nuts About sketches:


 And here is the layout I made:


As you can see I made a few changes to incorporate another photo, but otherwise stuck with the sketch. Then I added some Imaginisce glam rocks to sparkle it up a bit. I just love stars and the red, white and blue theme is awesome for these pictures.
   These photos of my son at 2 with a sparkler were about as clear as I could hope for considering how busy he usually is. Plus I loved that I captured his dad in there helping him be safe. Great moment.
Here's a couple close-ups:


 Thanks so much for stopping by. Don't forget to become a follower if you're not already. :)Ange

Supplies:
Moxxie - pp, stickers
imaginisce - glam rocks, irock tool
ranger - ink
srm stickers - sticker stitches
zig - black pen
tombow - tape runner

Tuesday, June 18, 2013

Sweet Baby

 Here's this week's sketch from Nuts About Sketches:


And this is what I created using it:


No photos yet, because it's a gift. It's hard to create some of these pages w/o photos. I just love overlapping the photos with elements of the page, so I would have been all over the title placement of this sketch if I had photos to add. But because I didn't I decided to add a bit of fun to the top of the dark photo mat going across the bottom by using a border punch along the top. Then I added the Sweet & Baby bingo cards and let them represent a title. I love the word stickers as a bit of fun over the journaling area but left the backing on them so they can go over the photo.

Thanks for stopping by and taking a peek. Ange

Supplies:
NAS - sketch
paper studios - kraft cs
simple stories - pp, word stickers
martha stewart - border punch
ek success - bubble sticker
ranger - ink
tombow - tape runner
stash - twine

Saturday, June 15, 2013

Birthdays everywhere!

Some times it feels like we are ALWAYS celebrating a birthday around here. May and August in particular are super busy birthday months for my family. Which means I've had birthdays on the brain and it wouldn't hurt to prepare for the upcoming ones right? So today, I wanted to show you some quick and easy birthday cards I made using the awesomely adorable Very Merry Unbirthday line by Moxxie.

I love the bright colors and bold patterns in this line. You can see all of it here. There's bright green, yellow, orange, blue and purple paired with very fun and bold patterns and designs. So it was really simple to make these cards.


I'll start with It's Your Day.


I really enjoy using double sided pattern paper for cards when I can because I love that you have a fun pattern decorating the inside too. But you have to either be sure that the B-side is something you can write over or add a journaling spot inside if your design is a bit wild. As you can see here, the B-side of this Celebrate pattern is a really pretty blue and easy to write over.
The cake is from the sticker sheet and the banner is a die-cut that I popped up with foam adhesive. I also added some SRM scallop stickers around the cake sticker to highlight it a bit more.


On this card I used green cs as the card base, then picked a fun print paper, punched a border in the top and bottom and layered some yellow cs behind it. Then I picked the fun Gifts Galore die-cut, tied a bit of twine around it and attached with foam adhesive. This card was finished off with purple stickles along the top and some more SRM border stickers to look like stitching.


 Last I went with a white base. I really wanted to use this Sweet Treats die-cut, so I matted it in black to really pop it. Then I cut the Celebrate out of a scrap, used my super old deco scissor to cut the sides, matted it in orange, used the scissors on that and then added some sparkly brads. The scallop banner/border is actually leftover from the SRM border stickers that I used on another project. I love using the "in betweens" of stickers whenever I can.
No project is ever "finished" without a little inking. I used different colors on each card. I know brown & black are great for defining edges this way, but I really love using bright colors like the purple on this last card, whenever I can.

I hope these inspire you to grab some cute, bright Very Merry Unbirthday of your own for your next project! Thanks, Ange

Supplies:
Moxxie - pp, die-cuts, stickers
SRM stickers - border stickers
dcwv & paper studios - cs
ranger - stickles, ink
sei - ink
stampin up - marker
ek tools - foam adhesive
tombow - tape runner
stash - twine, brads, deco scissors


Monday, June 10, 2013

My lil Guy

 If you're looking for the Moxxie hop just scroll down. It's the very next post. :)

Here is this week's NAS layout; My lil Guy:


This is a super awesome sketch! You can find it here. I used a couple of challenges to help me complete this layout. One was from My Scraps & More for NO patterned paper (I know, my mouth dropped open too!), but I managed to do it. And another from Memorable Seasons for pale/neutral background, strips of red/green paper & misting. Combine that with an awesome Nuts sketch and you have an awesome page.
Here's some closeups for you:


Thanks for stopping by! :)Ange

Friday, June 7, 2013

Reach for the Stars with Moxxie + giveaway!

Welcome to the June Moxxie Muse-A-Palooza Blog Hop! You should be arriving here from Rhonda's blog. This month one lucky follower will win the entire Reach for the Stars collection! You'll be over the moon and out of this world for this adorable collection designed for your little space cadets. Whether playing with a favorite toy, turning a shipping box into a spaceship, or watching a classic movie, pics of your little rocketman (or rocketwoman!) will go perfectly with this collection! It just doesn't get any cuter than this!


For a chance to win, hop through all ten participating blogs, check out all the spectacular creations of each Moxxie Muse, and leave a comment for each one of them. Comments close at midnight CST on Tuesday, June 11th. The winner will be announced Wednesday on the Moxxie Blog. International fans are welcome to play along if they agree to pay shipping in the event they win.

I have a set of 3 cards for you today.


These are super quick and easy to put together when you have so many fun die-cuts and stickers to partner with great patterned paper. Here's a close-up of each one:


Let's blast off! Remember to leave your comments along the way for your chance to win the Reach for the Stars collection!


I'm your last stop on the hop. Be sure to head back to the Moxxie blog and leave a comment there. Thanks so much for stopping by today!

Monday, June 3, 2013

Creating Beauty

This one was fun! I used the awesome NAS sketch you can find on Nuts About Sketches and made this layout:


About my daughter and her love of creating beauty with sidewalk chalk.
I used a Scraptastic kit and cut my own stencil to help me mist the sun design. I also added some dew drops, remember those? Yep! I'm doing some stash digging!
Here's a close-up and remember you can always click on the photos to see the details more clearly.


 Thanks so much for stopping by.